
Three legs: the switch's diet, the waveform, the load size
Leg one is the switch's own power. A no-neutral smart switch has no return path of its own, so it sips current through the bulb even when 'off' — enough to make efficient LEDs glow faintly or blink in the dark. Leg two is dimming method: phase-cut dimmers slice the mains waveform, and a non-dimmable LED driver fed slices responds with flicker, buzz, or a shortened life. Leg three is minimum load: switches calibrated for filament-era wattages misbehave under a 6 W LED that barely registers.
Identifying the failing leg is quick because each has a signature: glow or blink while off is leg one; flicker mainly at low dim levels is leg two; erratic behavior, failure to latch off, or flicker that disappears when a second lamp joins the circuit is leg three.
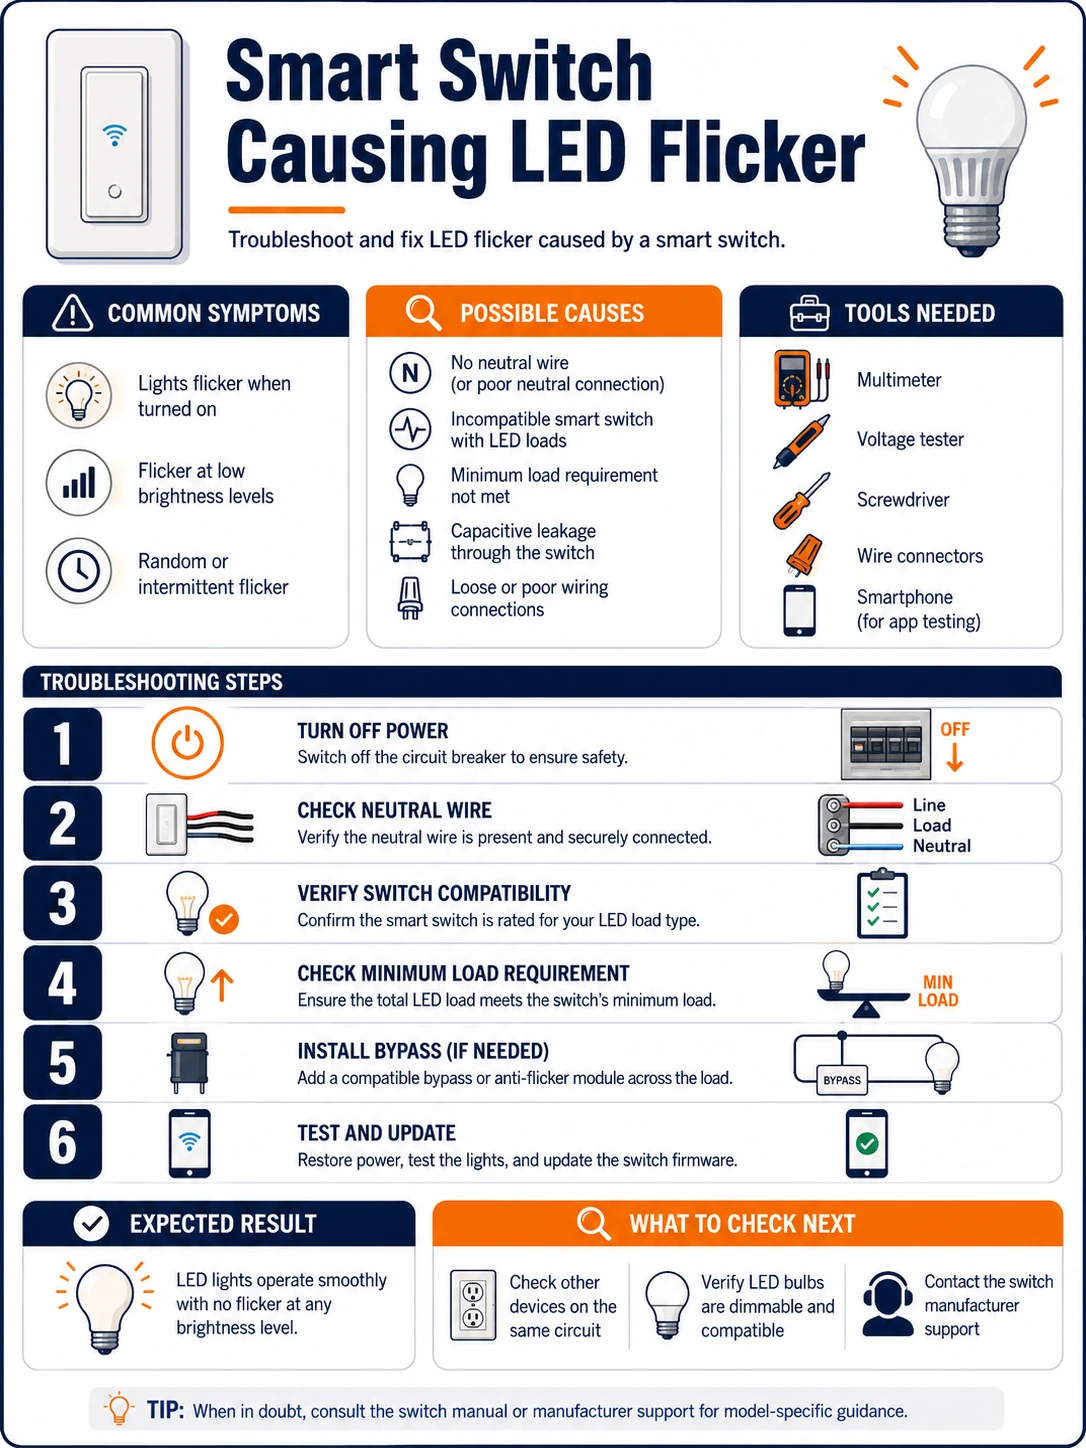
Prepare before testing
- The bulb's and switch's spec sheets — dimmable or not, no-neutral or neutral, minimum load figures
- One known-dimmable quality LED bulb — the cross-test that separates bulb from switch in one swap
- The switch's app settings — many expose a plain on/off mode and minimum-brightness calibration
- An electrician's number — bypass devices and neutral-wire work are professional territory
Settings, bulb swaps and observation are yours; anything inside the wall box — bypass modules, neutral pulls, switch replacement — belongs to a qualified electrician. Mains behind a faceplate is not a hobby zone.
Check these areas first
- No-neutral switch leaking through the LEDs. the switch's standby current lights efficient bulbs faintly or in periodic blinks
- Dimmer waveform meeting a non-dimmable driver. chopped mains into a driver that expects clean sine — shimmer, buzz, early death
- Load below the switch's minimum. a lone small LED under a switch specified for tens of watts of filament
- Edge mismatch. leading-edge switch driving capacitive LED drivers that wanted trailing-edge
- Mixed or aging bulbs on one circuit. one degraded or off-brand bulb can set the whole circuit shimmering
Diagnostic procedure
Name the switch type, verify the bulbs' dimmability, test the minimum-load hypothesis, then use settings, bypass hardware or a rewire — escalating only as the cheaper leg-fixes fail.
Identify the switch's type and method
From the model number and spec sheet: neutral or no-neutral installation, dimmer or plain relay, and if dimming, leading- or trailing-edge (or adaptive). This one datum predicts the failure signature and which fixes can work at all — a no-neutral dimmer has two legs under suspicion from the start.

Verify every bulb on the circuit is dimmable
Check each bulb or the fixture's driver for the dimmable marking — mixed circuits fail on their least compatible member. Any non-dimmable unit behind a dimming switch is a standing incompatibility: replace it with a dimmable equivalent, or plan to run the switch in non-dim mode permanently.

Swap in the reference bulb
Put the known-good dimmable quality LED in place of the most suspect bulb and observe: flicker gone means a bulb-side fix (replace the offenders with the working model's class); flicker unchanged means the switch side — its mode, its minimum load, or its wiring — carries the case forward.

Test the minimum-load hypothesis
Temporarily add load to the circuit: a second lamp on the same switched line, or swap one LED for a higher-wattage LED. Flicker that vanishes as load rises convicts the minimum-load leg. Note the threshold; it informs whether a bypass module or simply one more/warmer bulb is the durable answer.

Exhaust the switch's own settings
In the app: disable dimming (plain on/off mode) as a diagnostic — stability there implicates the dimming leg specifically; raise the minimum brightness floor above the shimmer zone; try the alternate edge mode on adaptive models; update firmware. These free adjustments resolve a substantial share of cases outright.

Escalate to bypass hardware or rewiring
For the stubborn remainder, the electrician's menu: fit the manufacturer's specified bypass/compensation module at the fixture (gives no-neutral switches their diet without leaking through the LEDs), pull a neutral to the box and fit a neutral-based switch, or swap to a switch whose specs match this load class. Match modules to the switch brand — generic capacitors across random terminals are how flicker becomes a fault report.

The no-neutral leak, explained and cured
LEDs glowing faintly or blinking every few minutes at 'off' is the no-neutral leg in its purest form: the switch keeps itself alive by trickling current through the only path it has — your bulbs — and efficient drivers accumulate that trickle until they fire. The cures, in order: the manufacturer's bypass module across the fixture (absorbs the trickle below the driver's firing threshold — electrician-fitted); a neutral-based switch where the box has or can gain a neutral; or bulbs whose drivers tolerate the trickle (some brands specify compatibility). The glow harms sleep more than hardware, but the periodic-blink variant does age drivers — worth fixing, not just curtaining off.
Specifying the pair correctly next time
Every leg of the triangle is avoidable at purchase: choose neutral-based switches wherever the box allows (their power path never touches the load), match trailing-edge dimmers to household LED drivers, and read the switch's minimum LED load against the actual fixture — a single 5 W bulb needs a switch specified down to 5 W or below, stated in LED watts, not incandescent-equivalent. Keeping one bulb brand-and-line per dimmed circuit finishes the job; dimmer compatibility is tested per driver design, and homogeneous circuits inherit the test result.